Did you know that homes without proper insulation can lose up to 35% of their heat through walls?
This latest statistic highlights why insulation isn’t just an option—it’s essential for Australian homeowners facing increasingly unpredictable weather patterns.
Keeping your home warm and efficient starts with smart wall insulation and floor insulation.
In Australia, where weather flips from hot to cold, good insulation is a must.
This blog shows you how to boost your home’s comfort with easy steps for floors and walls.
Why Insulation Matters For Australian Homes?
In Australia’s diverse climate, proper insulation serves as your home’s primary defence against temperature extremes.
Beyond comfort, wall insulation and floor insulation significantly reduce energy consumption, translating to substantial savings on utility bills.
The benefits extend beyond temperature regulation. Quality insulation also:
Reduces external noise pollution
Prevents moisture accumulation and mould growth
Increases property value
Contributes to environmental sustainability through reduced energy usage
Modern insulation solutions have evolved considerably, making installation more accessible and effective than ever before.
Whether you’re building a new home or upgrading an existing one, investing in smart insulation solutions delivers immediate and long-term benefits.
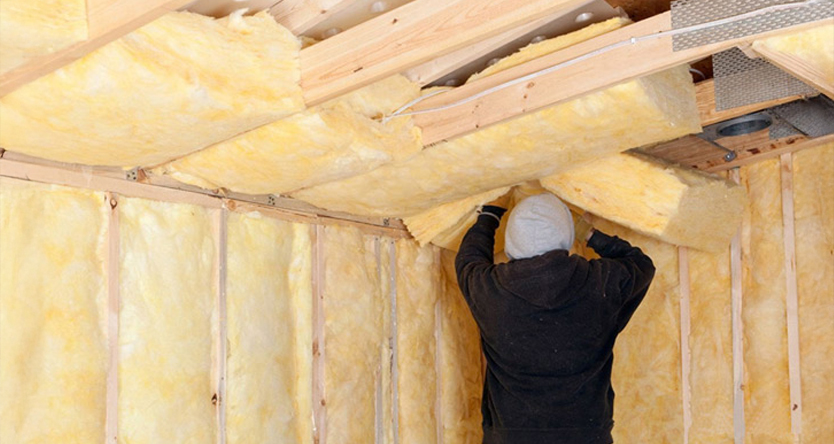
Wall Insulation – A Step-by-Step Approach
The walls of your home represent one of the largest surface areas exposed to external elements.
Wall and Ceiling Insulation work together to create a thermal envelope that maintains your desired indoor climate regardless of outside conditions.
1. Preparation – The Foundation of Success
Before any installation begins, thorough preparation ensures optimal results. Clear the workspace completely, removing furniture and fixtures that might impede access.
For existing homes requiring retrofit wall insulation, you’ll need to remove interior wall coverings to access the stud cavities.
During this phase, identify and mark the locations of electrical wiring, plumbing, and other services behind walls. This critical safety step prevents potential damage during installation.
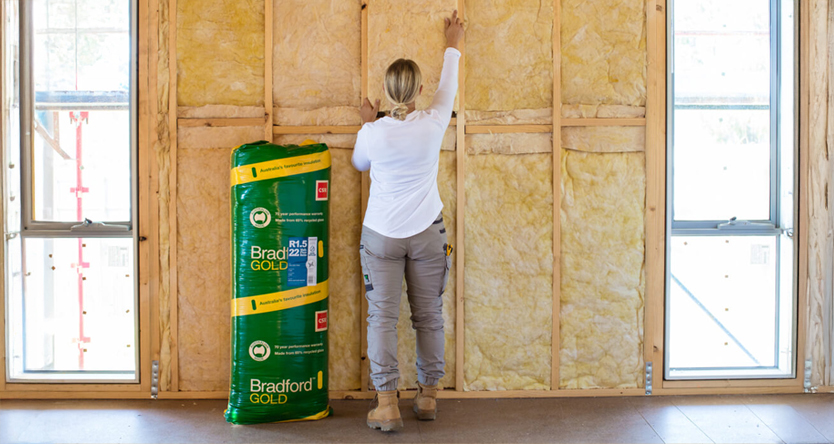
2. Measuring and Cutting – Precision Matters
Accurate measurements determine insulation effectiveness. Each stud cavity must be measured individually, as slight variations can occur even in modern construction.
The insulation material must fit snugly without compression, as compressed insulation loses significant thermal resistance value.
When cutting materials, allow for a slight overhang (approximately 1 cm) to ensure complete coverage without gaps.
This approach eliminates thermal bridges that could compromise performance.
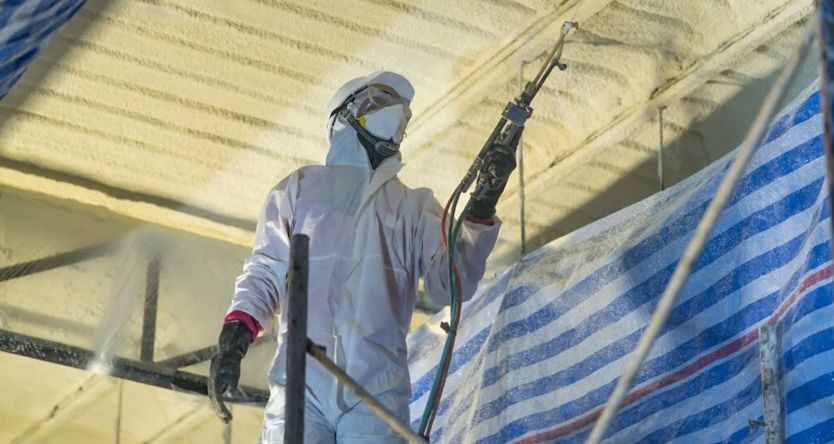
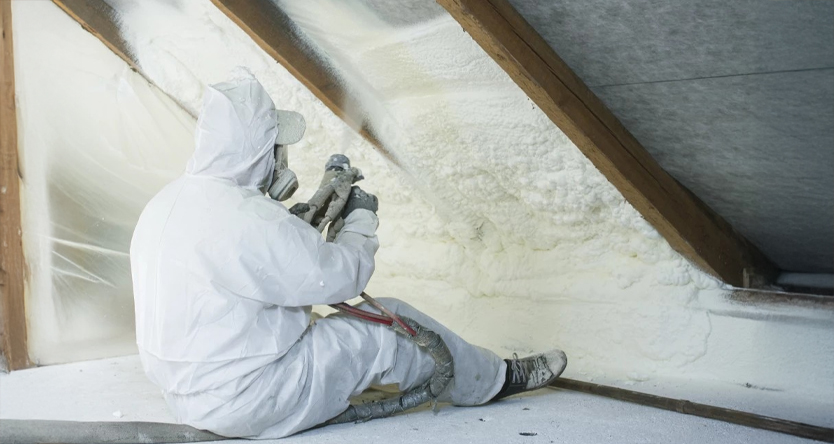
3. Installation: – Technique and Thoroughness
Professional insulation installers Melbourne residents trust and understand that installation quality directly impacts performance.
The insulation must fill the entire cavity without compression or gaps.
For batt insulation, the vapour barrier (if present) always faces the living space.
This positioning prevents moisture from being trapped within the insulation material, where it could condense and cause damage.
4. Finishing – Sealing the Thermal Envelope
Once the insulation is properly positioned, reinstalling drywall or panelling completes the thermal barrier.
All joints must be properly sealed with tape and compound to prevent air infiltration.
This final step not only improves appearance but enhances overall thermal performance.
Step-by-Step Guide To Floor Insulation
1. Access the Joists
For new builds, accessing the floor joists is simple. For older homes, you may need to lift floorboards or work from underneath through a crawl space. Adequate lighting and ventilation are essential during this stage.
2. Measure and Cut
Just like with walls, each cavity between the joists must be measured. Then cut your insulation to fit.
Many house insulation installers in Melbourne use fibreglass or underfloor insulation for timber floors, which are reliable for thermal control.
3. Position the Insulation
Place the material between the joists. Make sure it fits tightly without sagging. If you’re using a vapour barrier, it should go above the insulation layer to protect from moisture damage. This step is key for improving comfort in colder months.
4. Secure and Seal
Use mesh or wire supports to keep the insulation in place. Then reattach floorboards or coverings securely. Sealing all gaps helps prevent drafts and improves energy performance.
Materials To Use
What’s best for structural insulated panels or batts? Fibreglass batts are common – they’re cheap and work well for wall insulation and floor insulation.
Mineral wool is another solid pick, especially for underfloor insulation for timber floors. Both trap air and stop heat loss. Pick what fits your home and budget.
Here’s a quick table of key points:
| Area | Matrial | Why It Works |
|---|---|---|
| Walls | Fibreglass, Mineral Wool | Stops heat and noise |
| Floors | Fibreglass, Mineral Wool | Blocks cold from below |
| Vapour Barrier | Plastic Sheeting | Keeps moisture out |
Things To Watch Out For
Don’t cram insulation too tight – it needs air to work. Gaps are bad too; they let heat escape. For retrofit wall insulation, check old walls for wiring or pipes first.
Underfloor insulation installers say moisture is a killer – always use a vapour barrier if dampness is a risk. Skip these, and your efforts won’t pay off.
Ready For Easy Insulation?
Want cosy floors and walls without the hassle? AA Insulation has you covered! Our expert insulation installers in Melbourne make wall and ceiling insulation simple and affordable – no hidden costs, just top-quality work. We meet Aussie building rules and cut your energy bills fast.